


Getting the perfect brow henna stain for your client's brows can sometimes be difficult and definitely tricky, but we are here to help and share our expert tips on how to achieve this.
How to achieve the best results with our Elysian Valentina Henna? The trick is not only in the product itself, but the prep, mixture and technique. Follow these tips and you will achieve the most flawless henna brows!
Prep
First things first, prepping the area you will be working on is key and with brow treatments like henna, there is no exception! Preparation of the brows for henna colouring is very important and should be done carefully. You can take all the time you need to properly prepare the brows! The cleaner the brows, the better the henna can penetrate the skin.
What do clean brows look like? Free of all makeup, excess oils, dead skin and dirt. These all can act as a barrier and prevent the henna from staining the skin. Make sure to use the right products to prepare the brows: The Elysian Valentina Brow Scrub enriched with Walnut and Aloe Vera works great at removing any build up before the treatment, but also protects the skin from being too dry. Remember that most scrubs, or cleansers have oils hidden inside, so make those brows squeaky clean by finishing off with a Saline Solution.
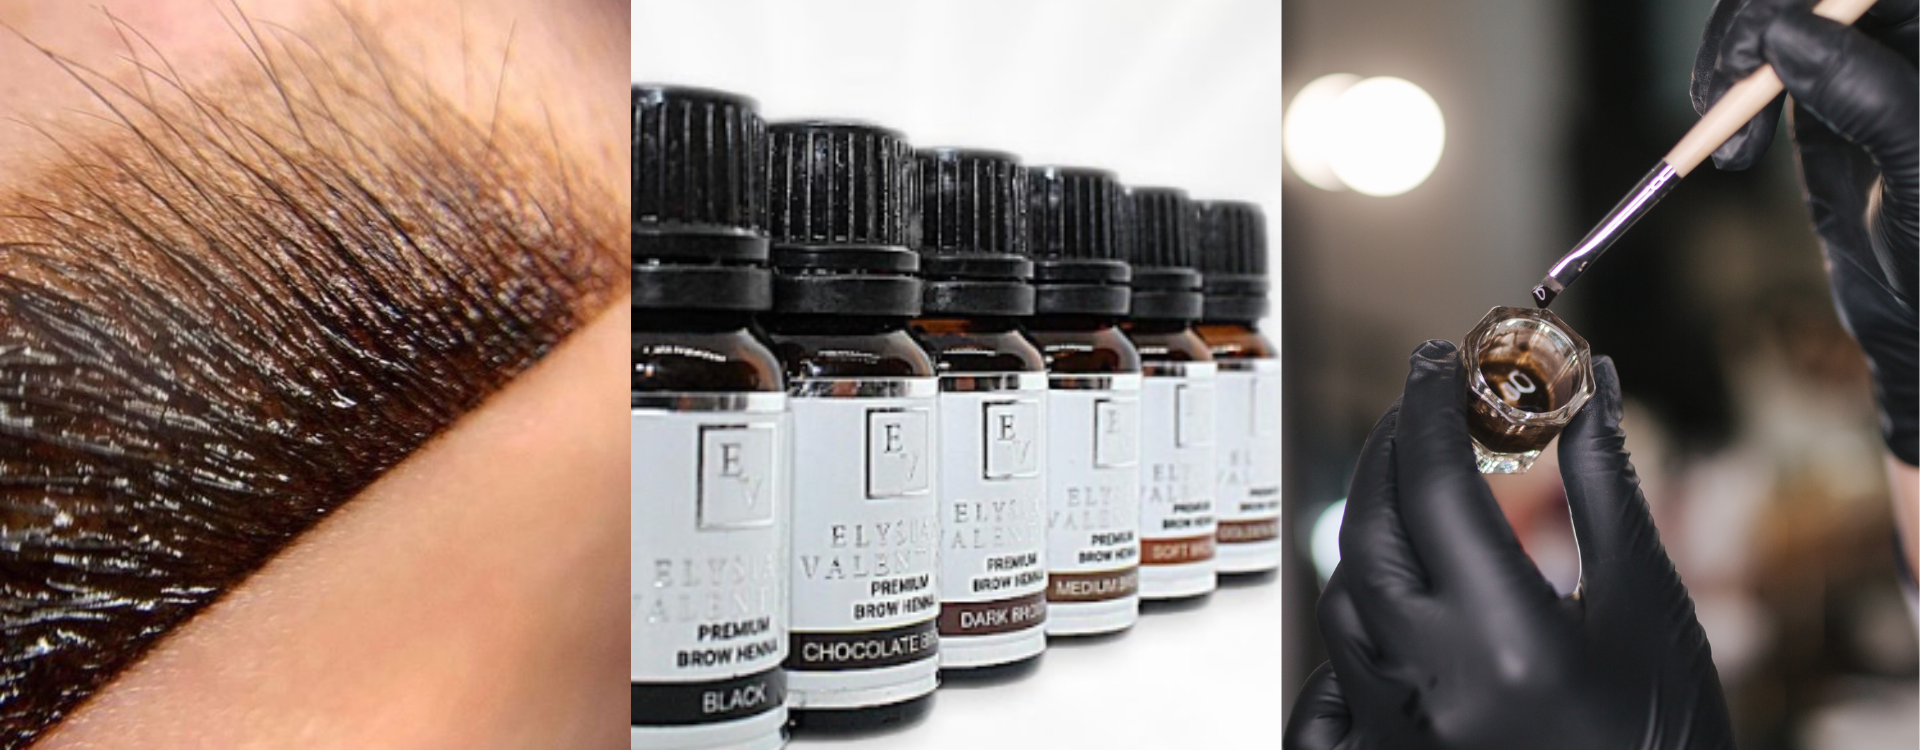
The Right Mixture
Henna can be tricky to work with if not mixed correctly. It needs to be runny enough to coat the skin and hairs, but not too watery that it bleeds in to surrounding skin. If mixed too thick, then it’s too hard to move around; I like to aim for a soy sauce consistency!
The Elysian Valentina henna doesn’t need time to oxidise, unlike other brands – you mix it up and use straight away. Ensure you have combined the powder and rose water thoroughly, which creates a silky, glossy looking liquid, then get to covering all hairs and skin in the brow.

Get Creative!
Don’t be scared to mix 2 or even 3 different henna’s together. This not only shows your creative side, but also demonstrates you are a true professional in the brow industry. When mixing your colours, you first need to decipher the client’s undertones, are you trying to counteract hues or compliment them, are you trying to cover an old faded tattoo, or create enough depth on an area there isn’t any hair? Either way, get to know your henna colours and then go for it. At the end of the day, they are all going to be some kind of brown, its only when you understand all the above then you will truly nail them.
My favourite combinations with the Elysian Valentina henna are 45% Soft Brown, 45% Dark Brown and 10% Black for a deep cool brown, or 70% Medium Brown with 30% Chocolate Brown for a gorgeous warm toned brow.

Processing Times
Have patience! Henna will not process in the same time a traditional tint or dye will. The minimum development time is 20 minutes, but this can be extended up to 30 minutes to give a deeper, longer lasting stain to the skin. As henna coats each hair, instead of penetrating, you need to give it time to lock itself on. If taken off too quickly, it hasn’t had chance to stain, it can appear patchy where it has grabbed certain areas but not others, and it won’t give you the longevity that is promised.
Stamping Technique
Another trick is using the stamping application technique, where you are stamping the henna onto the skin with small movements. The stamping technique, also called pressing, is the best technique for henna brow treatments to allow the henna to really penetrate the skin. Our Elysian Valentina Pro Brush Sets have the best silicone stamping tools in all different shapes and sizes to be able to fully customise your client’s brows.

Layer It Up
The EV henna likes to be wet; i.e. don’t let it dry out. Once it dries its stops developing, so apply layers to keep it working, but also to ensure full coverage of the area you are working on. It's better to apply multiple thin henna layers than to work with one super thick layer. Always wait for a little before applying the next layer onto the brows, once you have applied your first layer, wait a minute for it to absorb into the hair and skin. Make sure to stamp/press it deeply into the skin for it to stain both skin and hair.
Tip: After the 2nd layer, you can remove henna at the beginning of the eyebrows for a natural ombre look and leave the tail and mid-brow developing. This gives you also an insight into how quickly the henna develops on your client’s skin since this is different for every client.
Keep Dry but Hydrated!
The key to successful, long lasting henna brows – keep them away from water for at least 24hours. This means not washing your face, hot steamy baths and showers, humid kitchens and gyms – all of this moisture will dilute the effect and reduces the chance of long lasting results.
After the 24 hours, keep the brows hydrated with the Elysian Valentina Brow Elixir. This locks in the colour, keeps them glossy and protects the hair from environmental damage. It’s enriched with sesame, castor, coconut and almond oils it naturally nourishes, repair and promote hair growth.

Used all these tips and your henna game is still not perfect? These are possible reasons why your henna does not work:
- Your client is using a self-tan, this creates a barrier but can also be too drying on the skin and throw off different colours.
- Your client has an overly oily skin, try wiping with an alcohol wipe prior to starting.
- The henna was not left on the skin for long enough, remember you need at least 20 minutes.
- The aftercare instructions were not adhered too - water contact will ruin results.
- Your henna has expired. We recommend 6 months from opening and keeping lids on tightly .
- The client has damaged or scarred skin tissue – henna will not take to these areas.
We are sure that when following these tips the henna stain on your client's brows will be perfect! And remember: if you want to level up your henna brow treatments, check our Beauty Gallery Online and In Store Courses and demo days!
Leave a comment